
In garment construction, belt loops are small components with outsized impact. They carry the weight of the belt, hold up a thoughtful finish, and convey a sense of craftsmanship that observers notice even if they don’t articulate it. The belt loop’s design, material choice, and method of attachment can distinguish a premium pair of jeans from an average one. This article dives into belt loop construction details for a range of garments—from sturdy denim to refined trousers—and covers patterning, fabric selection, stitching, reinforcement, and production considerations you’ll need for reliable, repeatable results in an OEM/ODM environment.
1) The anatomy of a belt loop
Before you cut a single strip, it helps to understand the loop as a small structure with two anchor points and a flexible carrier. A typical belt loop is a narrow band of fabric or leather, long enough to accommodate most belt widths, and attached at the waistband and sometimes near the top edge of the garment. The loop’s role is twofold: to guide the belt through clothing and to distribute the pressure of a belt over a broader area so the garment doesn’t deform at the waist. In most designs, belt loops are rectangular or slightly rounded rectangles, roughly two to three inches in length on woven garments and proportionally scaled on smaller or larger sizes. The width of the loop should be close to, but not wider than, the belt that will be worn with the garment. If a belt is 1 inch wide, the loop often ranges from 0.75 to 0.95 inches in finished width, giving the belt room to pass through with minimal friction while still looking neat.
Besides size, two additional elements define a quality loop: anchor points and finish. The anchors are the points where the loop attaches to the waistband. A robust belt loop typically uses a reinforced top anchor and a bottom anchor, each secured with multiple stitching lines. The finish refers to how the outer edges are treated (folded, pressed, and topstitched) and whether the loop is constructed as a single folded piece or as a double-layer strip that is then folded with seam allowances concealed inside.
2) Pattern design and sizing for belt loops
Patterning belt loops begins with the belt width, fabric stability, and garment silhouette. In mass production, pattern grading focuses on consistent loop length, width, and spacing across sizes. A typical approach includes:
- Loop width: choose a finished width between 0.75 and 1.0 inches for common belt sizes (1 inch to 1.25 inches). For larger belts or more substantial denim, you may push to 1.25 inches while preserving clearance.
- Loop length: plan for a finished length around 2.5 to 3.0 inches on standard adult sizes, with proportional adjustments in smaller sizes (juvenile or slim fits) and longer loops for larger waists.
- Stitching allowances: include 1/8 inch seam allowances for single-fold loops and slightly larger allowances for double-fold or interfaced loops.
- Spacing: center loops evenly along the waistband. On jeans, an average count is five loops on a standard size, with variations for fashion-forward waistlines or designer silhouettes.
- Edge finishing: decide whether to raw-edge, serge, or apply an anti-fraying finish based on fabric type and end-use. Denim often benefits from a clean, self-finished edge that resists fraying through wear and washing.
For designers working in OEM environments, it’s essential to create a clear belt loop spec that includes finished dimensions, tolerance bands, and reinforcement requirements. A compact spec sheet can be integrated into the tech pack to ensure suppliers can reproduce loops consistently across batches and fabrics.
3) Materials and interfacing choices
The material choice determines durability, feel, and visual integration with the garment. Common options include:
- Woven cotton or cotton blends: the classic choice for denim and chinos. They offer solid strength, good wash performance, and ease of finishing. A double-layer loop built from a slightly heavier weave improves longevity under belt pressure.
- Polyester blends: used to add stretch resistance and to optimize wash performance. These can be integrated as a double-layer fabric or as a single-layer loop with a robust topstitch finish.
- Nylon or synthetic interfacings: used inside the loop when extra stiffness is required to maintain a crisp silhouette in lightweight fabrics or to prevent loop collapse after repeated belt insertion.
- Leather or faux leather: a premium option for dress pants and high-end outerwear where the belt is an established part of the brand aesthetics. Leather loops require edge finishing and careful topstitching to prevent cracking over time.
Interfacing or light stabilizers can be added between layers to reduce stretch and preserve loop shape. When using interfacing, ensure it can withstand repeated washing and ironing without adhesive residue or stiffness that makes the loop feel stiff or brittle.
4) Step-by-step construction for a standard denim belt loop
This section outlines a reliable method that balances speed with durability, suitable for mid-volume production lines. Adapt the steps based on fabric type and machine capacity.
- Cutting: Cut two identical fabric strips per loop from the chosen material. Typical finished width is 0.75 to 1.0 inches, with a length of 2.5 to 3.0 inches. If you plan to fold the loop into a double-layer piece, cut a single strip double the desired finished width and fold around a central crease.
- Interfacing (optional): If using interfacing, apply a light fusible interfacing to one side of each strip or sandwich it between two strips to create a double-layer loop with added stiffness.
- Folding and pressing: Place the wrong sides together and fold along the long edge to form a clean, double-layer edge. Press firmly to set a sharp crease. If you’re using a single fold, fold in half along the length and press to create a crisp center.
- Edge finishing: Edge-stitch or topstitch along both long edges to secure the fold and improve durability. A distance of 1.0 to 1.5 millimeters from the edge is typical (roughly 1/16 to 3/32 inch in finished measurement), but align with your sewing machine’s presser foot and needle width.
- Attaching to waistband: Align the loop relative to the waistband’s edges. This is usually 2–3 inches apart for jeans with five belt loops, but the spacing should be consistent across garment sizes. Use two complete lines of stitching at each anchor point, with backstitching at the start and finish for extra security.
- Bartacking and reinforcement: Use a bartack stitch pattern at the top and bottom anchors. If the garment design calls for more reinforcement, add a cross-stitch or small rectangle around the anchors to distribute stress.
- Final pressing: Press the loops again after stitching to set the shape and flatten the seam allowances along the waistband. This step helps maintain alignment with the belt line and contributes to a professional finish.
Variations include using a single-layer loop with a wider top and bottom bar, or a narrow, stitched “thread loop” that is anchored with minimal fabric mass for lightweight garments. The choice depends on the end-use garment’s weight, the expected belt width, and the desired aesthetic.
5) Variations in belt loop design and technique
Not every garment uses the same loop. Here are several common variations and the situations in which they excel:
- Double-fold loop: The classic, most durable option. Achieved by folding fabric in half and then folding the finished strip again, resulting in a clean, squared edge that rides smoothly over the belt.
- Single-fold loop: Simpler and faster to produce, suitable for lightweight fabrics or fashion pieces where weight is intentionally reduced and a softer look is desired.
- Thread or “thread belt loop”: A very narrow loop made from a single thread or a tiny fabric strip that looks like a thread when stitched. This method is used for ultra-light garments or for dramatic, minimalistic aesthetics. It often requires specialized machine settings or hand-guided finishing.
- Leather or faux-leather loops: Used for formal wear or premium denim. Edges are burnished and stitched with heavy threads to emphasize luxury and resistance to wear.
- Elastic belt loops: Some athleisure or stretch fabrics use elastic loops to accommodate stretch belts or casual wear with adjustable fits. These require careful testing for recoverability and seam integrity under repeated bending.
Each variation has its own set of requirements for pattern accuracy, fabric behavior, and stitching density. When designing for a brand’s line, consider the garment’s overall style language and the consumer expectations for performance life span.
6) Stitching, sewing machine setup, and seam allowances
The quality of a belt loop is heavily influenced by how it’s sewn. Pay attention to stitch density, thread type, and needle size to avoid uneven edges, skipped stitches, or puckering. General guidelines include:
- Thread: Use a color-matched polyester or cotton-poly blend for denim; a heavy thread (40 or 50 weight) provides strong reinforcement. For premium leather accents, consider a waxed thread for increased abrasion resistance.
- Needle: A Universal 90/14 or a Denim needle (dependent on fabric weight) provides a stable path for the stitch lines without perforating the strip or causing fraying.
- Stitch length: For topstitching, a longer stitch length (about 3.0 to 3.5 mm) gives a bold, durable line. For anchor lines, a standard 2.2 to 2.5 mm stitch length is common, with backstitch at the start and end.
- Density on anchors: The top and bottom anchor points benefit from reinforced bartacks. A short, tight stitch pattern around the anchor distributes stress more evenly than a long, loosely spaced line.
- Presser foot and seam gauge: Use a walking foot or a regression foot for fabrics prone to shifting. A seam guide helps maintain even spacing between loops along the waistband.
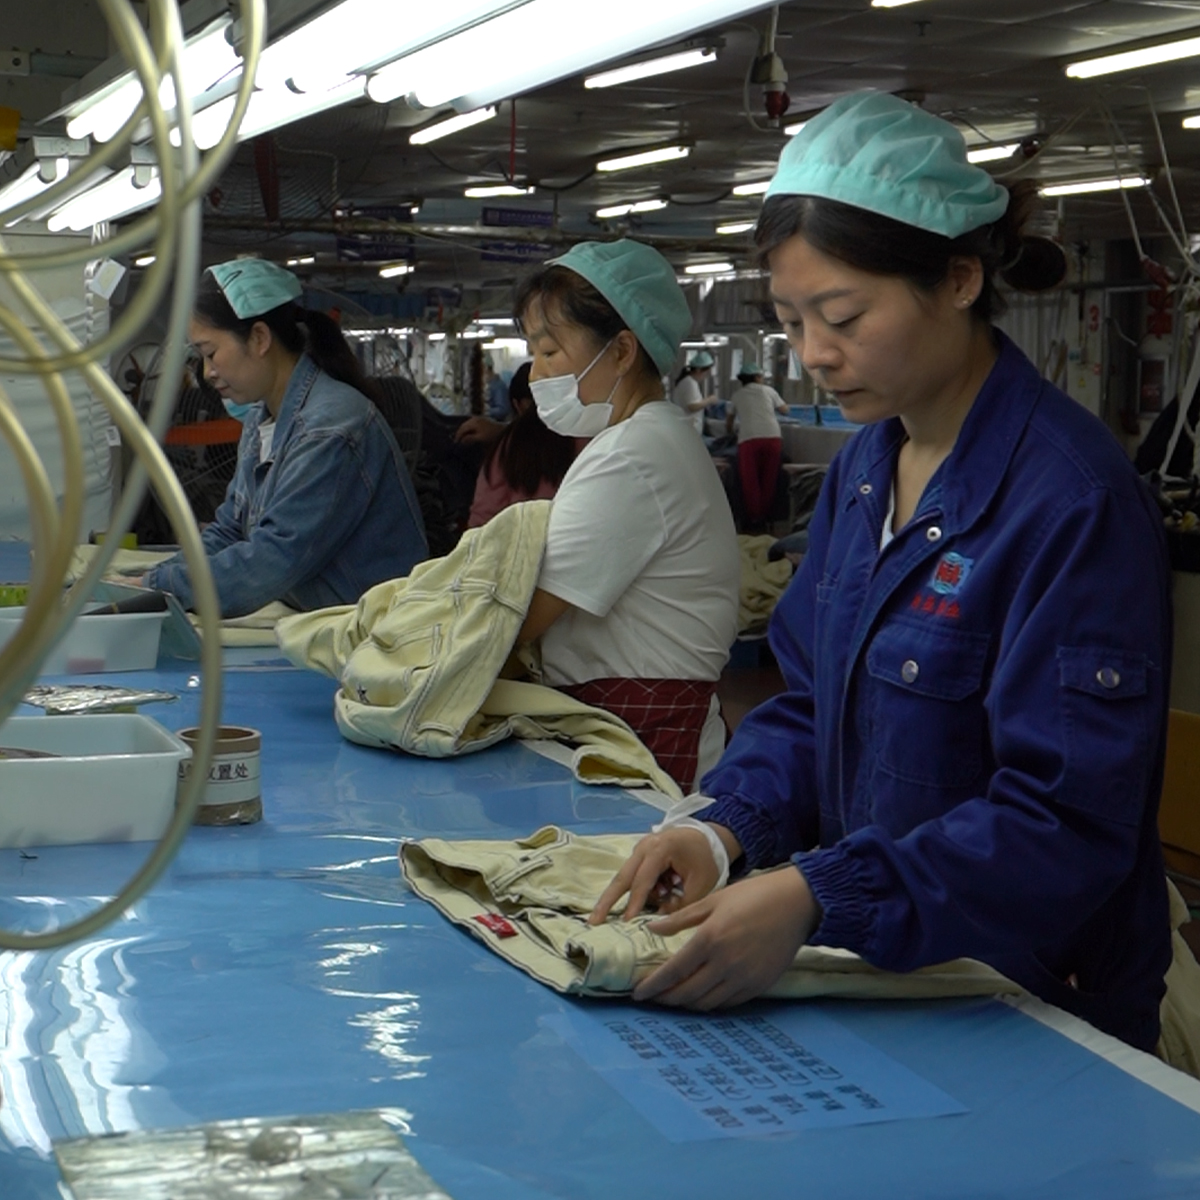
Line operators in a factory setting often rely on a dedicated belt loop station where fabric strips are prepared, pressed, and stacked for fast feeding into the machine. In such setups, maintaining consistent fabric tension and pre-pressing accuracy reduces variability across lots.
7) Finishing, pressing, and edge care
Finishing touches separate good work from great work. A well-finished belt loop not only looks neat but also resists fraying after repeated washings and belt insertions. Best practices include:
- Edge finishing: For woven loops, edge-stitching close to the edge creates a clean line that aligns with the garment’s seam lines. If using a raw-edged loop, ensure the fabric has sufficient stability to withstand wear without curling.
- Pressing: Use a tailored pressing sequence—first on a clapper to set the crease, then a final press with steam to flatten the waistband area. Alignment between loops and the waistband must be preserved during pressing to avoid misalignment after wear.
- Fray prevention: For fabrics prone to fraying, apply a lightweight fray-preventive solution or opt for a tightly woven fabric with finished edges. Finishes should be tested through wash cycles to ensure longevity.
- Quality checks: After finishing, measure each loop’s finished width and length. Compare against the spec tolerance window and inspect anchor stitches for uniformity and thread breakage.
8) Quality control, testing, and production considerations
In an OEM/ODM environment—like a denim specialist producing for global brands—repeatability and traceability are crucial. Quality control steps include:
- Sample grading: Create a clear grading scale that covers smallest to largest sizes and ensures loop dimensions stay within tolerance bands across all sizes.
- Wash and wear testing: Subject sample loops to repeated washing, drying, and belt insertion to evaluate shape retention, edge integrity, and anchor strength. Note any shrinkage or texture changes.
- Line balancing: For high-volume lines, track the time required per loop and identify bottlenecks. Streamlined loops reduce defect rates and accelerate production without compromising quality.
- Supplier qualification: Establish supplier defaults for fabric weight, weave, and finishing, and require a preproduction sample with exact loop dimensions to be approved before mass production begins.
9) Production-ready workflow and tooling
To maintain speed without sacrificing quality, implement a production workflow that standardizes each step. A typical workflow includes:
- Material prep: Cut, label, and pre-press loop strips. Use color-coded markers to identify loop width classes for quick recognition on the line.
- Layering and folding: If using two strips per loop, align and stack with precise edge alignment. If a double-layer loop is laminated with interfacing, verify that the interfacing direction aligns with the garment’s grain for stability.
- Sewing station: Equip a dedicated belt-loop stitching station with a consistent feed path, correct needle, and a seam guide. Keep a spare set of needles and threads to reduce downtime during shift changes.
- Pressing station: A compact pressing station ensures loops are pressed before final attachment to the waistband, preserving alignment and minimizing puckers.
- Final inspection: Use a go o-go gauge for loop width and length and visually inspect anchor stitch density and edge finishing under strong lighting.
10) Sustainability and lifecycle considerations
As brands increasingly emphasize sustainability, belt loop construction can contribute to responsible manufacturing in several ways. Consider choosing fabrics that maintain dimensional stability through multiple wash cycles, reducing the need for replacement, and selecting threads with a high recycled content when possible. Design loops that minimize material usage without compromising strength, and engineer processes that maximize yield from fabric scraps to reduce waste. For premium lines, consider leather alternatives sourced from certified tanneries or use recycled leather fibers for accent loops to balance luxury with eco-conscious storytelling.
11) Quick-reference patterns and templates (practical tips)
Keep these practical notes handy on the shop floor or in your tech pack:
- Always design loops with finished width slightly narrower than the belt width to ensure smooth insertion and removal.
- Include a top reinforcement line at the top and bottom anchors; consider a small rectangle or cross-stitch at the anchor points for added resilience.
- For heavy fabrics like denim, consider two lines of topstitching on each edge instead of one to share the load and avoid curling.
- Use a consistent seam allowance across all loops to simplify grading and ensure uniform results across sizes.
- Document the loop’s exact dimensions in the product spec, and attach a printout to the sample garment for verification during audits and line checks.
With clear documentation and a reliable manufacturing process, belt loops become quietly dependable components that support the garment’s performance and brand story.
12) Final reflections: crafting loops that endure
From the pattern to the production line, belt loop construction blends precise measurement, disciplined technique, and thoughtful material choices. A well-made loop does its job invisibly—until the moment you slide a belt through, and the loop behaves exactly as it should: secure, comfortable, and aesthetically aligned with the garment’s intent. For manufacturers partnering with forward-thinking brands, investing in robust loop construction is an investment in product integrity and customer satisfaction that pays dividends long after the first wash cycle. The belt loops you design today set the standard for tomorrow’s silhouettes, enabling brands to grow with confidence and wearers to feel the difference every time they reach for their belt.